An Impression FX presentation consists of slides from the original PowerPoint or PDF document with transition effects with flexible settings inserted between them. Interactive menu and presentation control are added automatically when a presentation is generated.
Create an Impression FX presentation following these simple steps:
Once the Impression FX presentation is created, you can view it in interactive mode or convert it to a video.
Open your PowerPoint presentation in Microsoft PowerPoint (with the Impression FX plugin installed) and select Impression FX tab in the PowerPoint control panel.
For a PDF documentOpen your PDF document in Impression FX Lite for PDF using the File/Open PDF menu option.
 Create Presentation
You can create a presentation by simply pressing the Create Presentation button immediately after opening the original file. When you do that, the presentation is created with default transition effects and menu.
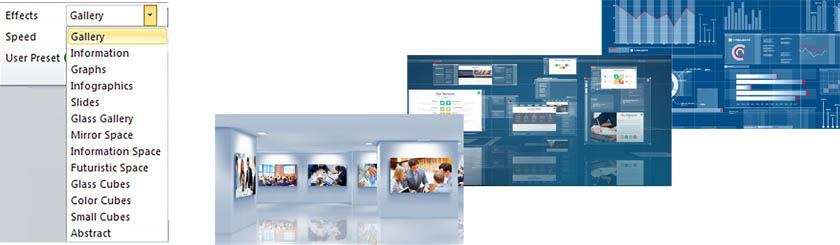
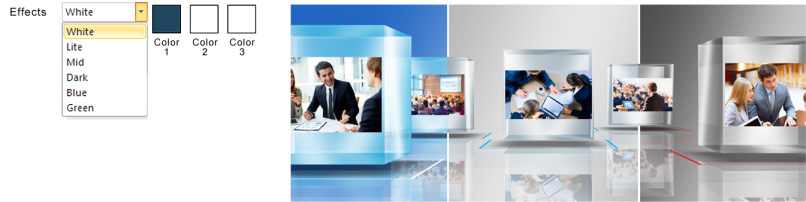
In the Effects drop-down list select one of the sets of transition effects. Each set contains several effects of the same type that will be automatically inserted when generating a presentation.
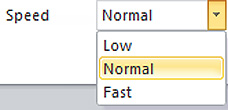
Set up the transition speed if necessary. In most cases the Normal default speed is appropriate.
You can adjust the color of most of Impression FX transition effects.
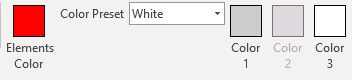
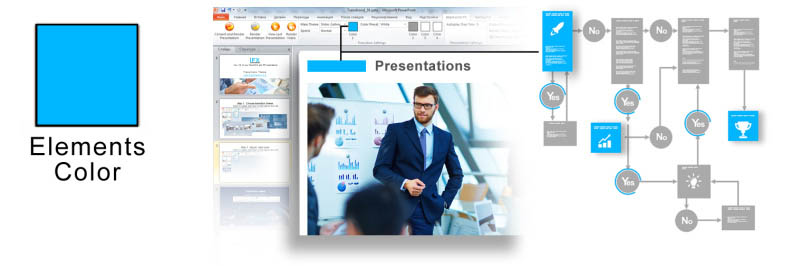
Setting up the basic color of design elements
If you can determine a basic color for most of the slides in your presentation or document design, you can change the Elements Color in the menu to match it. Some elements of transition effects will be painted that color and the slide transition will match the style of the original presentation better. If there is no basic color in your presentation, you can set Elements Color to any value of your choice.
Selecting color preset for transition effects
Each set of transition effects in Impression FX has six preset color schemes (Color presets): white, light, medium, dark, blue, and green. Color Preset sets color values for Color1, Color2 and Color3 that determine the colors of transition effects. Select one of the six values for Color Preset that best matches your presentation design.
You can also set your own color values for Color1, Color2 and Color3 to fine tune the settings of color presets for effects. When you set up the colors for Color1, Color2 and Color3 yourself, bear in mind that each color has its own meaning and paints different transition elements. Use this feature carefully as you can easily get a color combination that does not look good or is not appropriate.
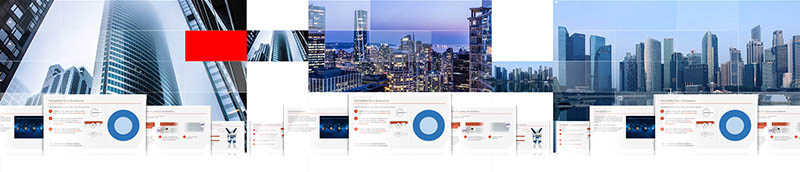
Transition effects using slides
Some of Impression FX transition sets use slides as a part of the design solution. Such effects are noted with (slides) in the title. These effects are configured the same way as any other ones. Slides are automatically embedded in the transition, so the user cannot change their order.
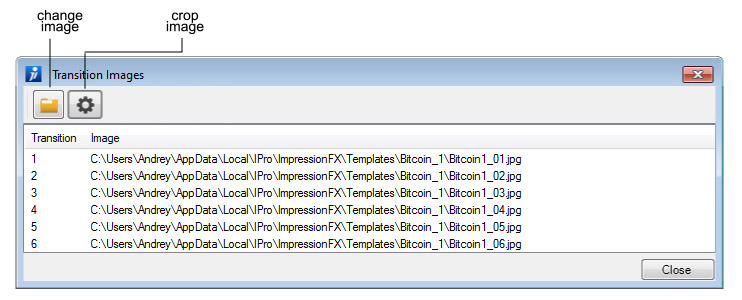
Transition effects using images
Some of Impression FX transition sets use extra images. Such effects are noted with (pics) in the heading. Select one of such sets in Effects and click Additional Images, which will be clickable after selecting the corresponding effect.

Add images in the newly opened window Extra Images. Recommended image resolution is 2,000 pixels and more. The images will be used in transitions following the same order in which they are listed. If the number of transitions is higher than the number of images, the images will repeat: after the last one will go the first, and so forth.
Open the menu settings window by clicking Presentation Menu.

Main Settings
In Menu Type, select the menu design scheme.
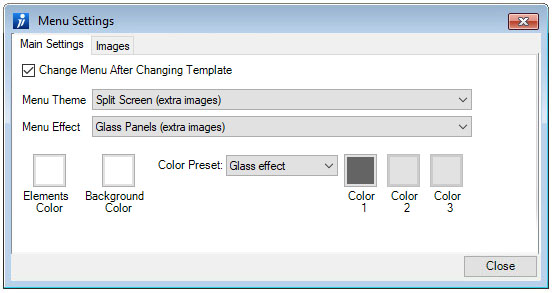
Configuring the menu color scheme
For most menu types, several color schemes are pre-defined which can be selected in Color Preset.
Depending on Menu Type , the color scheme can either completely change the menu colors, or only affect small elements of the menu. This is defined by the selected menu type design.
Depending on the menu type, some of the colors such as Main Color, Color1, Color2, Color3 will be customizable.
When you set up these colors yourself, bear in mind that each color has its own meaning and paints different menu elements.
Use this feature carefully as you can easily get a color combination that does not look good or is not appropriate.
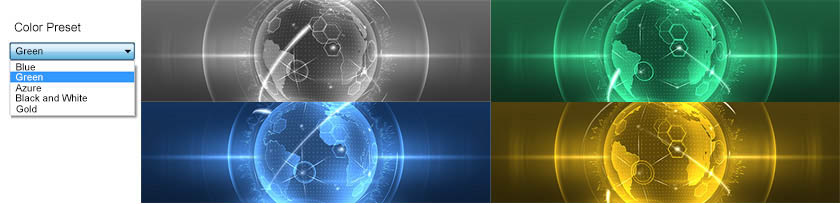
Image-based menu
Design of some menu types is based on the images selected by the user. If the user selects such a menu type, then in Presentation Menu they will see an additional Images tab.

Select images to display in the menu. Recommended image resolution is about 2,000 pixels or slightly more. The number of images listed is defined by Menu Type and cannot be changed by the user. Those of the listed images that are not set, will be replaced by default images.
Logo
The presentation menu may contain the logo or another image laid over the menu. To do so, open Logo tab.
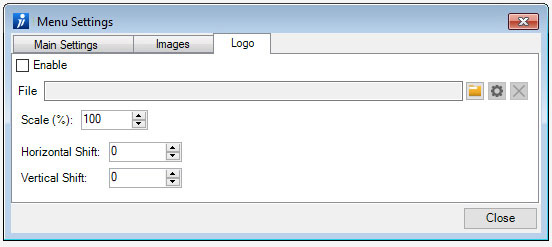
Upload the logo image in File and click Enable. The logo image will be added to the menu.
Adjust logo size with Scale. Adjust logo position with Horizontal Shift and Vertical Shift. Initial size and position depend on the selected Menu Type.

Menu types for 4x3 slides
Menu design in Impression FX is aligned to 16x9 slides (default format).
Using of 4x3 slides may lead to the improper appearance of some types as the part of an image is sliced off.
For such types, a dedicated 4x3 type is pre-defined. In the list, such types are noted with (format 4х3) in the title.
Set the path to the presentation you are creating. To do so, click Settings in the right part of Control Panel of the PowerPoint version. In the PDF version, go to File/Settings. Set the path in Output Directory. By default, your presentation folder will be saved on your Desktop.

Create an Impression FX presentation by pressing the Create Presentation button.
Create Presentation
The presentation you create is saved in the folder named as your original PowerPoint or PDF document.
Once the project is created it will launch automatically.
You can control your Impression FX presentation using a keyboard, a mouse, a touch screen or a wireless presenter.
Controlling the presentation using your keyboard and mouse is very similar to managing a presentation in PowerPoint.
You can see the description of presentation control by pressing the F1 button on your keyboard.
For more details on controlling an Impression FX presentation see the Impression FX Presentation Control page.
To exit the presentation, double-click Esc.
To view the last created presentation—without creating it again—click
View Presentation

You can launch the presentation on any Windows OS computer or device by simply copying the presentation folder and launching the IFXplayer.exe file.
You can launch auto slideshow from any slide by clicking A key. You cannot enable auto slideshow in the menu.
In this mode, the slides will follow one another automatically and the presentation will run in a loop – the last slide will transition to the first one.
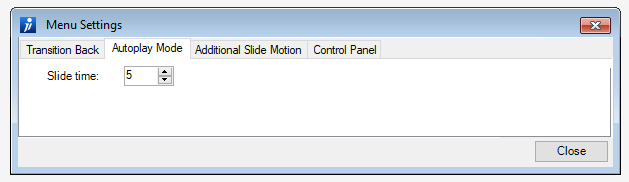
Presentation Settings

In auto slideshow, the period of showing a slide is defined in seconds in Slide Time (Presentation Settings window, Autoplay Mode tab). This time also determines the length of time each slide is displayed when creating a video.
Additional slide motion
By default, the slides shown will be static for the entire duration of Slide Time.
Impression FX allows you to set up additional slide motion during the time from the end of one transition to the beginning of the next.
This enables you to create a continuous animation without pauses with slides in motion and slide transitions.
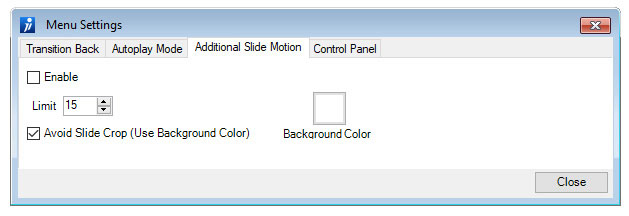
In order to set up additional slide motion turn on the Slide Motion Enable option. Slide motion range is determined by the Limit value and is set in percentages of slide size. Limit value may be either positive or negative.
Negative Limit value sets slide size changes from (100 - Limit)% to 100%.
Positive Limit value sets slide size changes from 100% to (100 + Limit)%.
The color of background at the time the slide is growing is defined by the value of Background Color.
The background is only visible if the Limit value is negative.
You can change any of the presentation settings: transition effects, colors, menu settings, etc. and re-create the presentation. To do that, simply change the settings as you wish and press the Create Presentation button again.
When creating a presentation, one often needs to keep the current settings for further use without configuring them again. To save and load the previously saved settings, use Save/Load Project.
To transfer an Impression FX project to another computer, collect all project files in one folder by clicking Collect Project Files in Settings window.
The project will be gathered in the folder with the specified name.
(Located in Project/Collect menu option in the PDF version of Impression FX Lite).
To create a video based on an Impression FX presentation, press the Create Video button.
 Create Video
A dialogue window will appear where you can set the parameters for the video file.
Then press the Create button. The video file will be placed in the same folder as the presentation files.
The name of the new file will be the same as that of the presentation file. If a video with the same name was created earlier, the file will be overwritten.
Remember that the video is created based on the last created presentation. If you changed the settings, then create a presentation first—to apply the changes—and then create the video.