Impression FX PRO
Impression FX is a Powerpoint plugin for creating sharp and memorable presentations and slideshows from any PowerPoint project. Impression FX creates a presentation based on slides of the original document (which are taken as still images), adding customizable transition effects, an interactive menu for selecting slides, and easy, versatile control.
Getting started
After installing the plugin, start PowerPoint, open (or create) any presentation containing at least 2 slides, and select the Impression FX PRO tab on the PowerPoint ribbon (it will appear after installing
the plugin). Click the "Presentation Editor" button to open the main plugin window.

Brief description of the interface
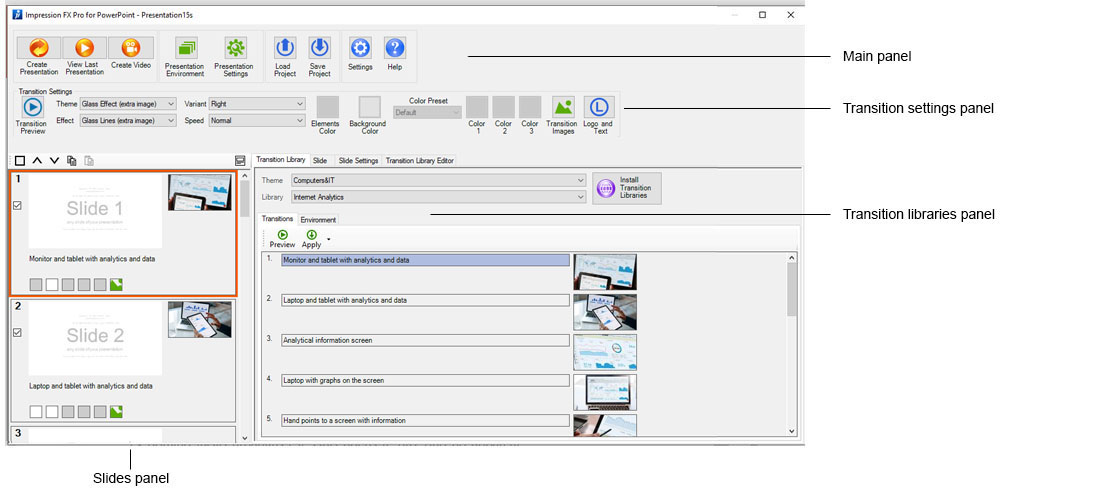
Impression FX PRO interface consists of four main parts:
You can find a full description of the interface here.
Creating presentation
The algorithm for creating a presentation in Impression FX PRO is very simple:

Transition Effect Libraries
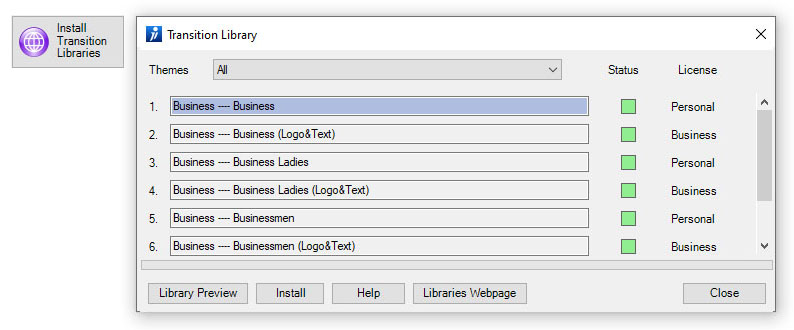
Impression FX PRO provides the user with a large number of transition effect libraries. Some of the effects are installed with the plugin.
You can additionally install the main part of thematic libraries by clicking the "Install transition libraries" button (an Internet connection is required).
All effect libraries are categorized by subject (business, finance, computers, city, etc.), so you can easily install exactly the effects you need.
Additional installed effects are based on images, which you can change to your own if necessary.
Previewing transition effects
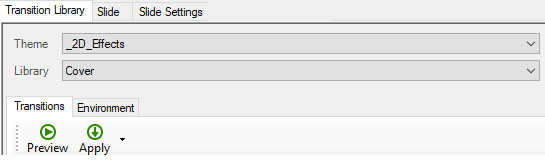
To select the transition effect you need, use the two drop-down lists: "Theme" and "Library". Each library contains a set of ready-made transitions.
You can see how the transition will look on any slide - to do this, select the slide on the slides panel, select the desired transition from the list in
the library and click the "View" button. To view the transition, the player window will start (use the Space button or the right arrow button to start the transition,
the left arrow button to return to the start slide and Esc to exit).
You can also see the images used in the effect by double-clicking on any of the icons.
Selecting and configuring Transition Effects
In order to apply the selected transition to the current slide, click the "Apply" button or simply drag the desired transition with the mouse to any slide.
After the effect is applied to the selected slide, you can further customize it using the Transition Settings panel.

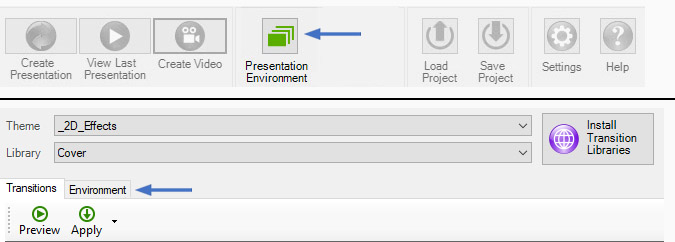
Customizing environment design
If you want to change the environment design, you can do it in two ways:
Creating a presentation with the selected settings
To create an Impression FX presentation with selected transition settings and environment, click the Create Presentation or Create Video button.
The path to the created presentation can be changed by clicking the “Settings” button on the Main panel.

Viewing an interactive presentation
After the presentation is created, it will automatically start. To control the presentation, it is enough to use the 4 arrow buttons on the keyboard and the mouse.
Press F1 to view all control options (after starting the presentation).
To view the latest Impression FX presentation for the current PowerPoint project, simply click the View Presentation button on the Main Panel.
If you changed the effect settings after creating the presentation, you have to create the presentation again for the changes to take effect.

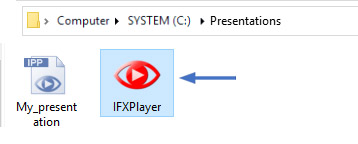
Viewing your presentation on another computer
An Impression FX presentation is a standalone multimedia application that does not require installation Impression FX or any other software to be viewed.
To view the presentation on another computer, just copy the folder with the created presentations and run IFXPlayer.exe.
You can save the effect settings using the “Save Project” button on the Main Panel. The next time after opening a PowerPoint project,
you will just need to open the saved project by clicking the “Load Project” button.
